Crochet Otis the Octopus
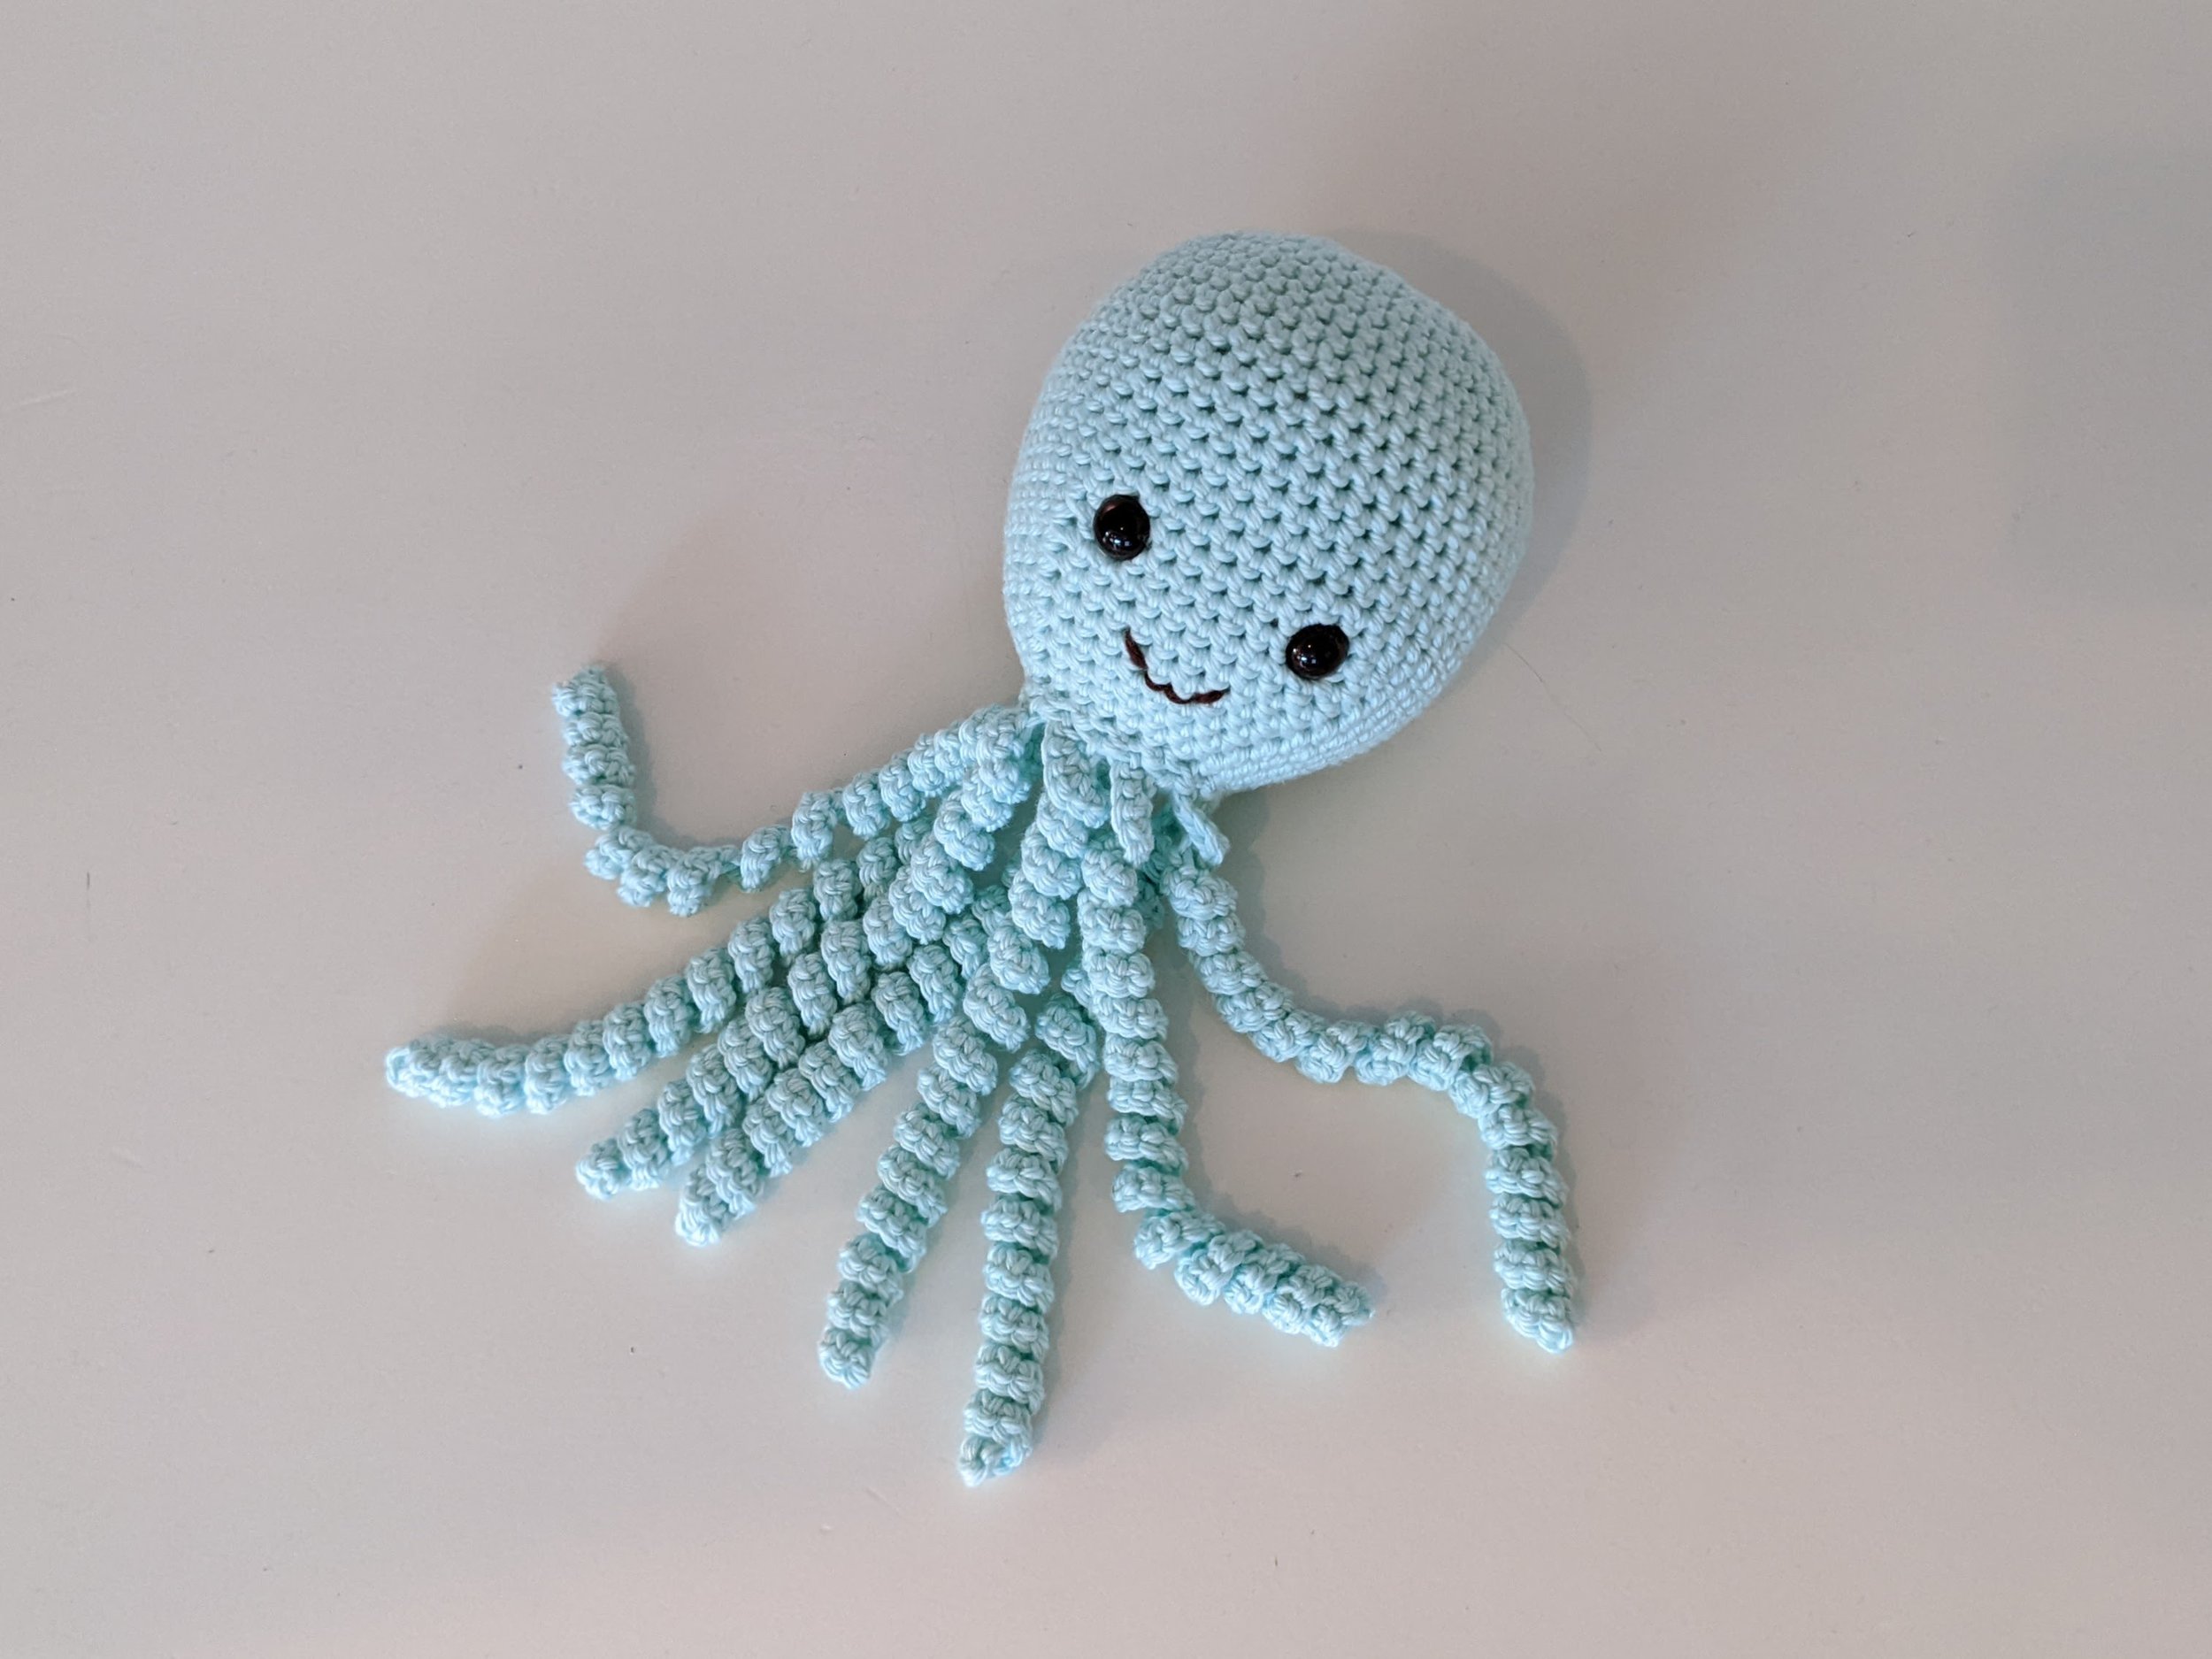
My son turned 6 months old this past month, and to celebrate we went to Sea World for the first time. His cousins came with us as well and the kids loved getting up close and personal with so many wonderful sea creatures. After our visit, I wanted to create a cute sea creature amigurumi toy to remember our adventure and I decided to start with this simple, adorable Octopus. As a bonus, Otis the Octopus also looks fantastic sitting on my son’s shelves in his Ocean themed nursery.
This cute octopus is made with size G crochet hook using “I Love This Cotton” yarn from Hobby Lobby. I chose to use mint colored yarn to blend in with the colors in his nursery, but Otis would look great in any color. To make the tentacles tighter, I used a size D hook to crochet the tentacles, but this is optional - it will work just fine using a size G hook throughout. One of the best things about this pattern is the entire octopus is created as one piece; no sewing or attaching different parts required! The curly tentacles are my favorite part and my son loves weaving his fingers into them. The tentacles are also really easy for his little hands to grab. I chose to add 8mm safety eyes, but if plastic eyes make you uncomfortable, this little guy would also look great with embroidered eyes as well.
SPECIFICATIONS
SIZES
Finished octopus is about 11” long from the top of the head to the bottom of the curled tentacle; circumference of the head is about 12” at the widest point.
MATERIALS
Hook: Size G crochet hook (size D crochet hook is optional if you want tighter tentacles). This is my favorite crochet hook and yarn needle set I got from WooCrafts. The set is really affordable and comes with 9 different-sized crochet hooks, 8 yarn needles, stitch markers and a cute carrying case.
Yarn: one half skein of Hobby Lobby’s “I Love This Cotton” yarn in Mint or Aqua - or any color of your choosing. If you don’t have a Hobby Lobby nearby, you can also order it on Amazon here. You will also need crap amount of black or dark brown yarn for the mouth.
Scissors
Stitch Marker (optional)
Yarn needle
ABBREVIATIONS
Ch = chain
Sl st = slip stitch
SC = single crochet
SCD = single crochet decrease
SC BLO = single crochet in back loop only
MR = magic ring - find a great tutorial here
INSTRUCTIONS
The octopus is crocheted as one continuous piece; there is no need to sew or assemble any pieces. For each round below, repeat from * until the end of the round unless otherwise noted.
OCTOPUS HEAD
To start: MR, 8 SC in MR
Rd 1: *2 sc in each st around (16); optional: place stitch marker to indicate the start of the round
Rd 2: *2 sc in next st, SC 1 (24)
Rd 3: *2 sc in next st, SC 2 (32)
Rd 4: *2 sc in next st, SC 3 (40)
Rd 5: *2 sc in next st, SC 4 (48)
Rd 6: *2 sc in next st, SC 11 (52)
Rd 7-16: SC around
Rd 17: *SCD, SC in next 11 (48)
Rd 18: *SCD, SC in next 10 (44)
Rd 19: *SCD, SC in next 9 (40)
Rd 20: *SCD, SC in next 8 (36)
Rd 21: *SCD, SC in next 7 (32)
Rd 22: *SCD, SC in next 6 (28)
Rd 23: *SCD, SC in next 5 (24)
For the next round, you will work the stitches in the back loop only. This will leave the front loop of the stitch unworked, which should look like a line across the wrong side of your work. You will come back later to grab those front loops on the wrong side and finish off the octopus.
Rd 24: Working in the Back Loop Only of each stitch, *SCD, SC in next st (16)
At this point, you can loosely stuff the octopus head. This should give you a better sense of where you want to place the eyes and mouth.
Eyes: Next attach the safety eyes as directed on the packet. I placed mine around row 17 approximately 6 stitches apart. You may need to remove some stuffing to attach the eyes. If you don’t feel comfortable using safety eyes, you can also embroider on the eyes using your yarn needle and scrap amounts of black or dark brown yarn.
Mouth: Using a yarn needle and your scrap black/brown yarn, stitch on the mouth. Feel free to make the mouth any shape you prefer. I placed mine about 3 rows below the eyes and made it about 4 stitches wide and one row high.
TENTACLES
Now come the fun part: making the tentacles! I like this method because it allows you to create the arms using one continuous piece of yarn — no attaching or weaving in ends required! To create your first tentacle, follow these steps:

(optional: switch to size D hook to create tighter tentacles)
Step 1: sl in the next stitch in the round.
Step 2: Ch 60
Step 3: 2 sc in the second chain from the hook, then 2 sc in each chain until you reach the beginning of the chain
Step 4: at this point you should be back to the base of your octopus, sl in the next st in the round to finish the arm.
Repeat: Repeat steps 1-4 to create the remaining 7 tentacles. Once you have created all 8 tentacles, you should have worked all 16 stitches in the round.
FINISH AND CLOSE
Now it’s time to close the bottom of your octopus. If you haven’t already, finish stuffing your octopus head so that it is firm to the touch. Next follow these steps:
Look for the unworked front loops from round 23; they should look like a line on the inside (wrong side) of your work. You will work the next round into these loops.
Rd 1: Slip your hook into this unworked front loop and SC - repeat this all the way around (should have 24 SC st when the round is completed.
Rd 2: *SCD, repeat around (12 sts)
Rd 3: *SCD, repeat around (6 sts)
Rd 4: *SCD, repeat around, sl to join (3 sts)

For Rd1 of close, SC into the unworked front loops
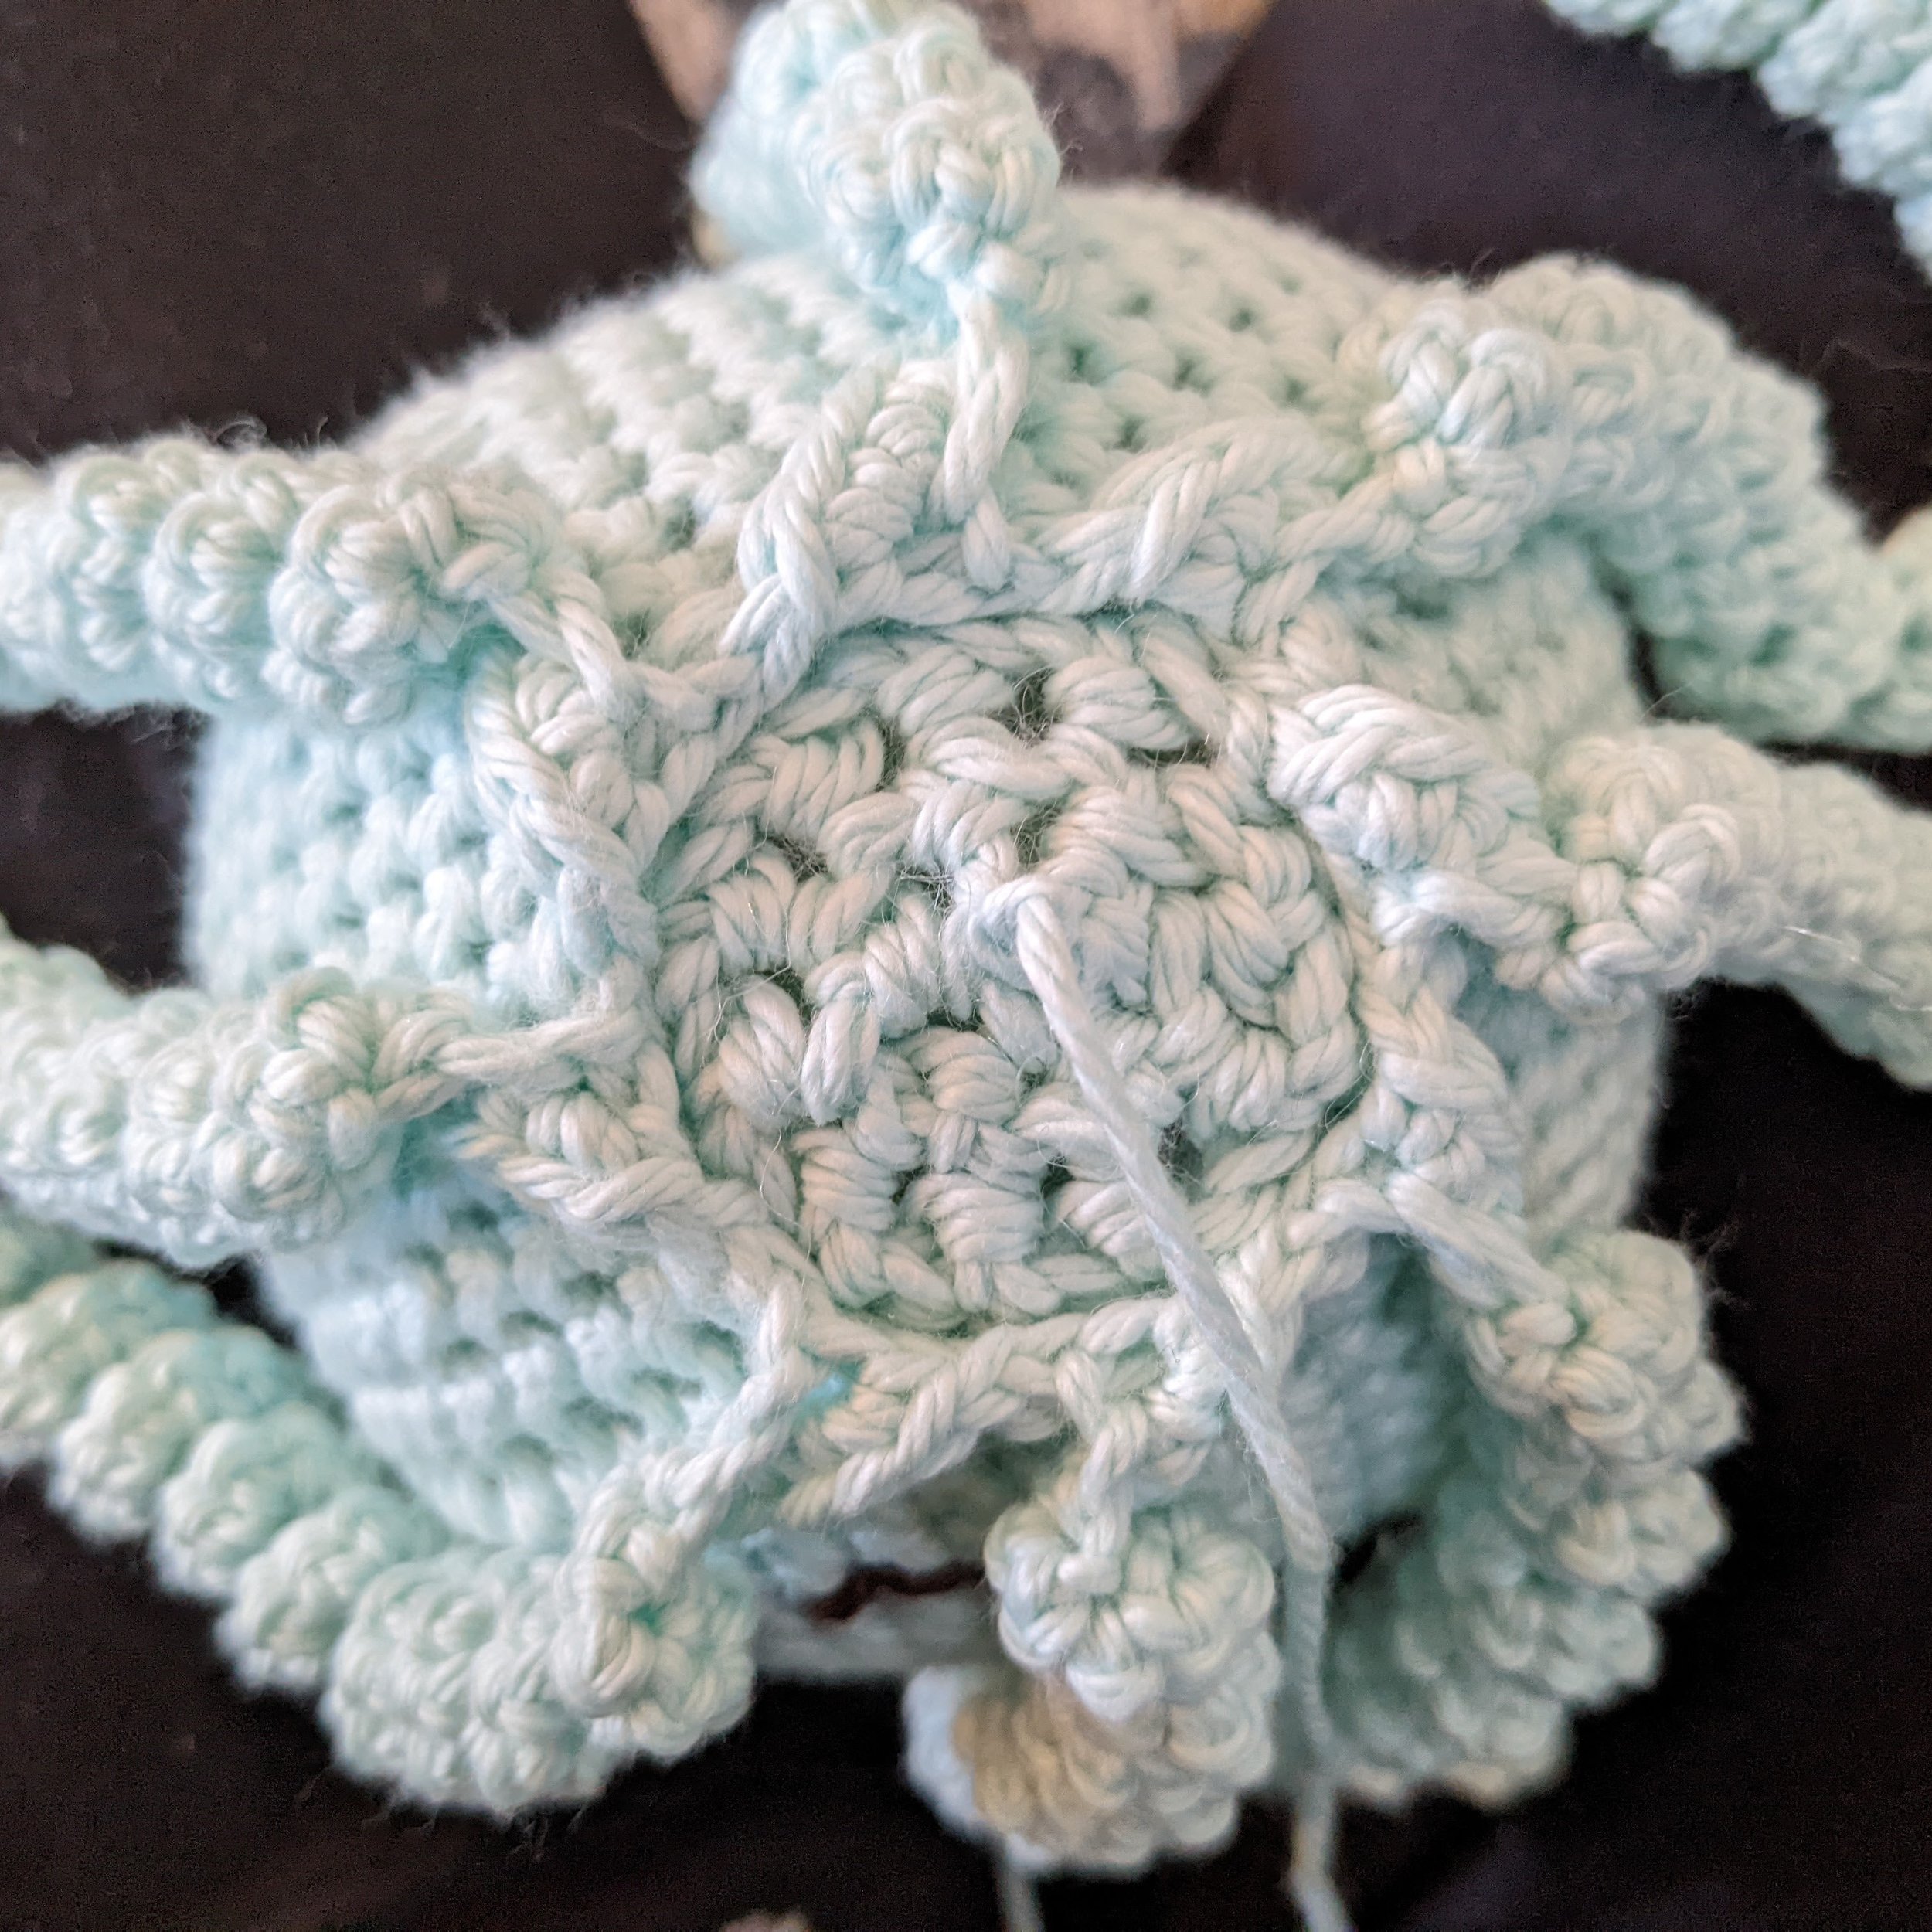
Underside of the octopus after finishing the close
At this point your octopus head should be closed. For extra security, you can thread your yarn through the remaining 3 stitches and pull tight to close. I didn’t feel this was need on my octopus, but you can use your judgement.
Weave in any loose ends.
Enjoy!!

My son loves digging his little fingers into the tentacles!
***You may make and sell products from my patterns but if you do I ask that you link back to my post. Please do not copy and post this pattern and claim it as your own, or attempt to sell this pattern. Please do not re-publish photos as your own.