Elegant Star-Stitch Potholders
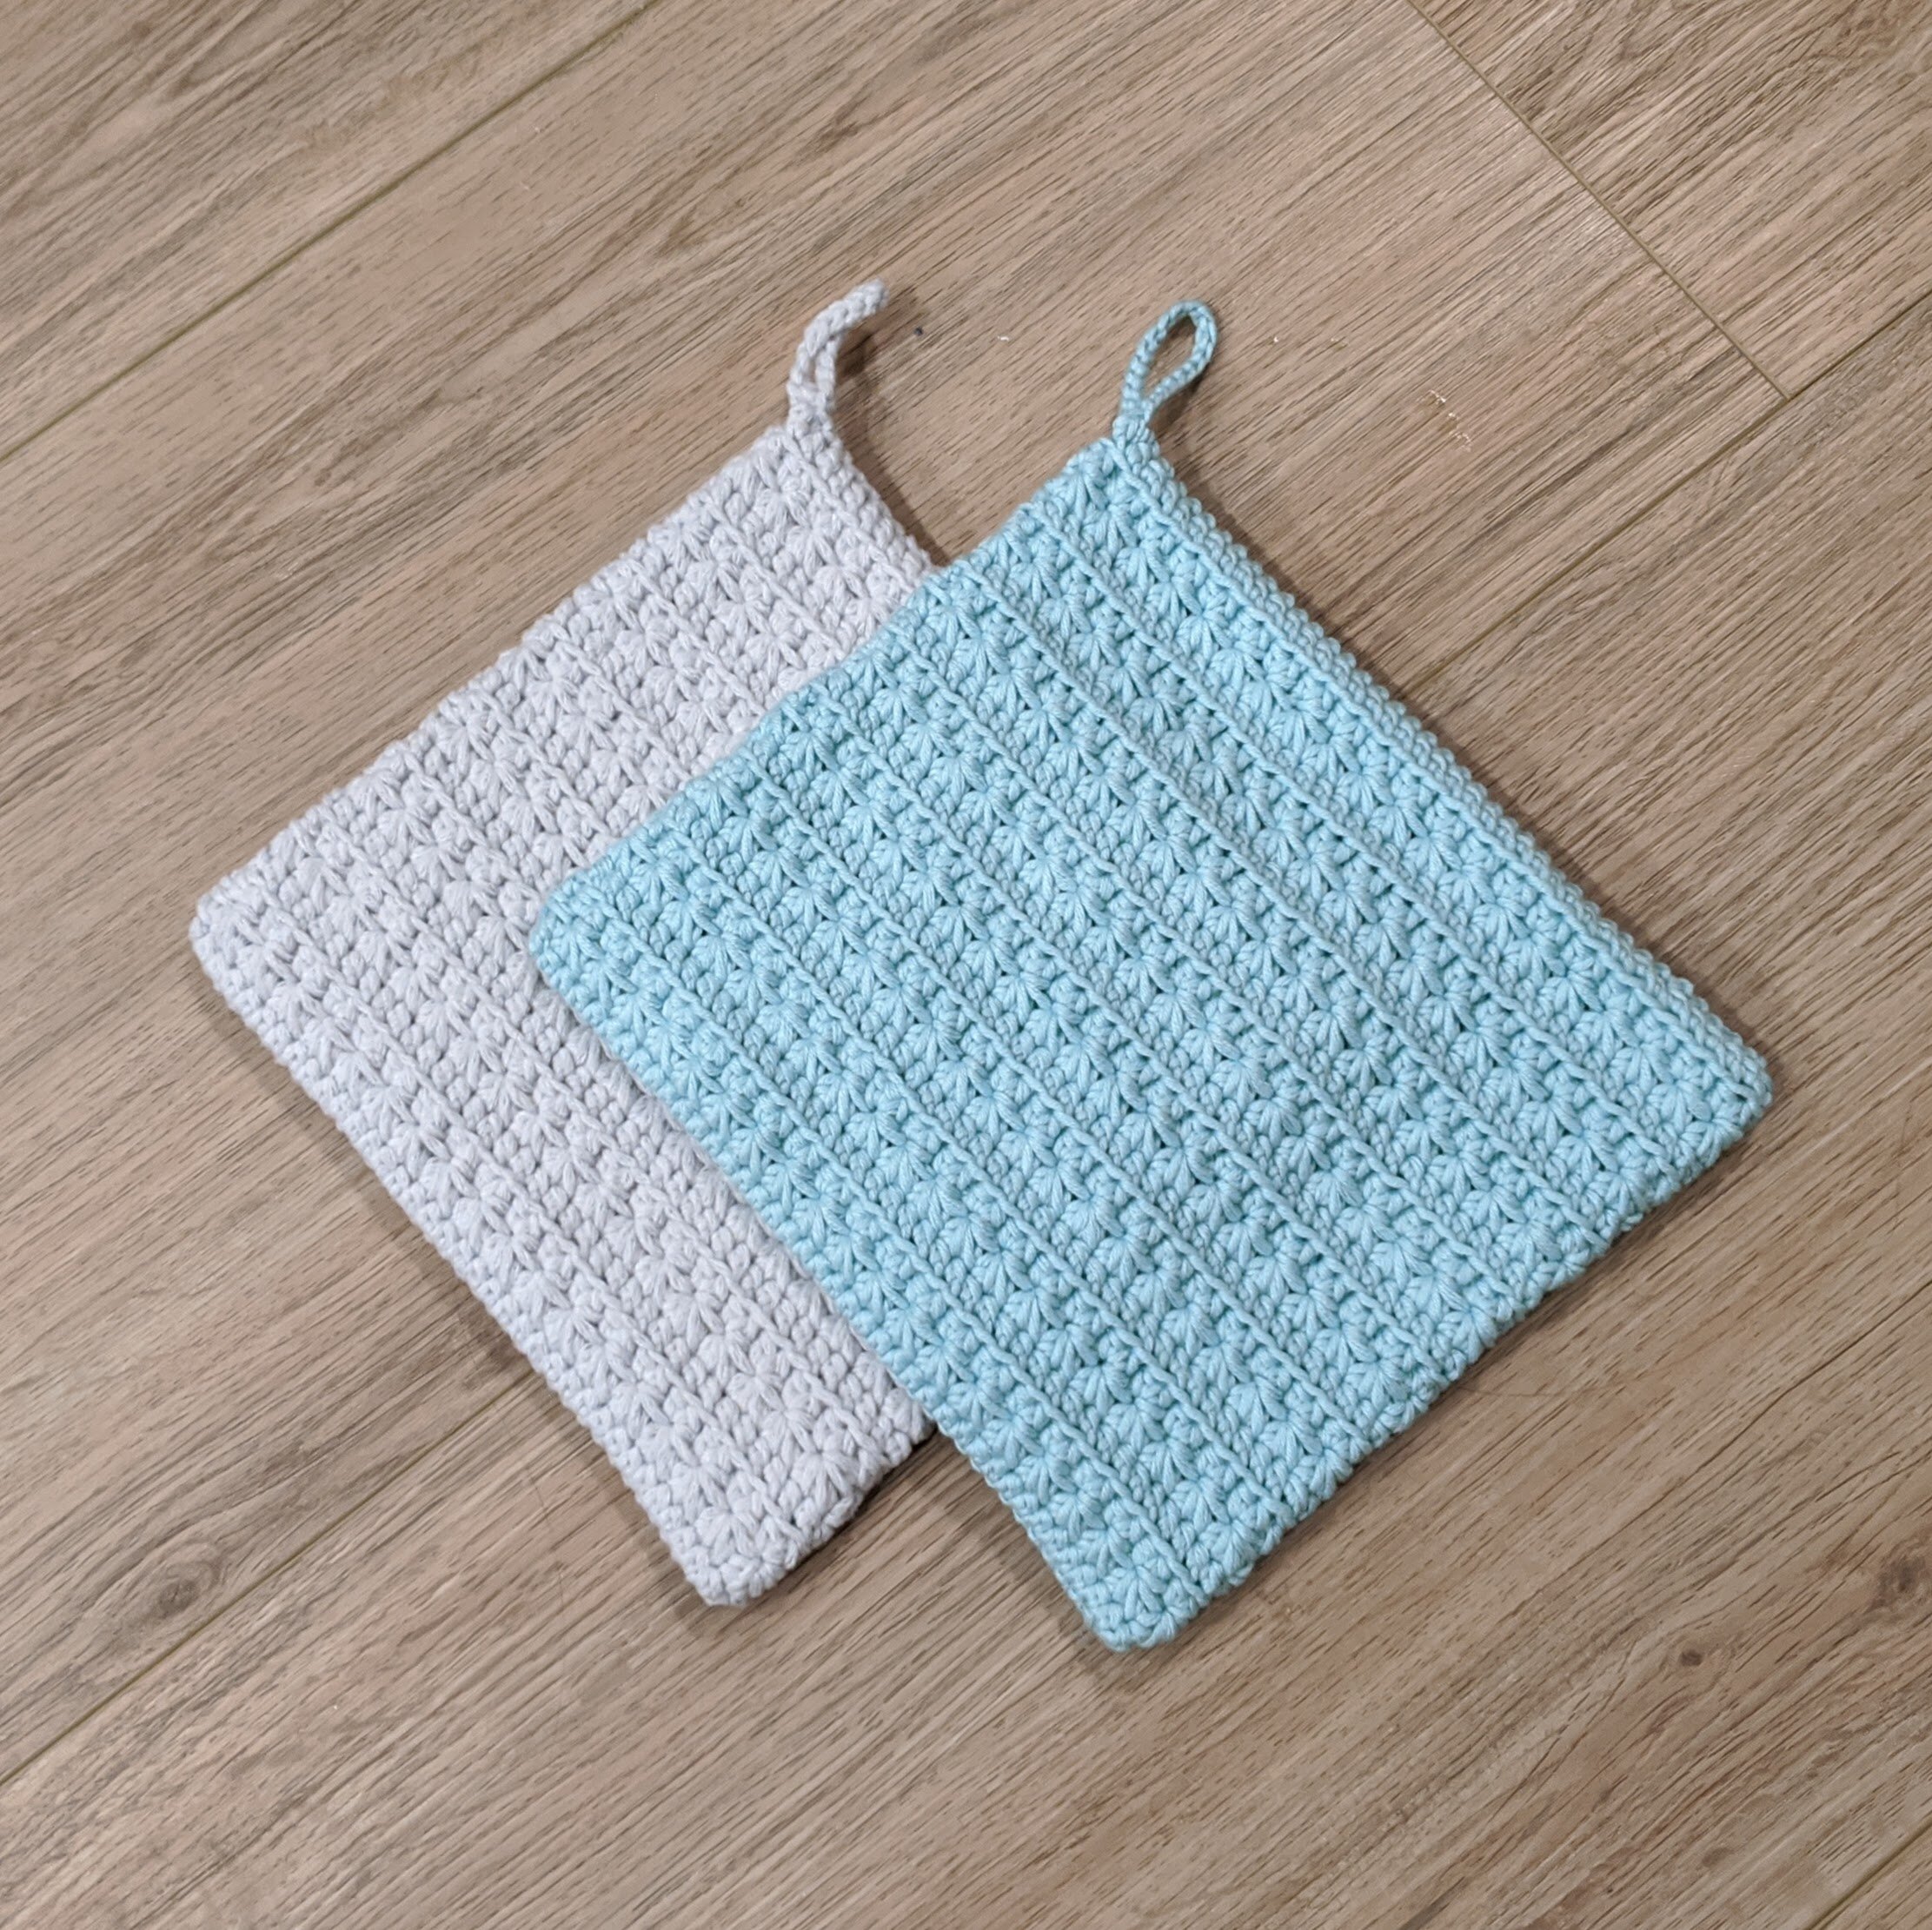
Pot holders, hot pads, or trivets - as they are also called - are a staple for any home cook. Why not put your crochet skills to work and make some of these to add a little color and character to your kitchen?
I love crocheting potholders because they are easy to make and can be completed in just a couple of hours. They also make great gifts - perfect for housewarmings, birthdays, Mother’s Day - or any day you want to say thank you to a home cook in your life.
This pattern uses a combination of the star stitch and half double crochet worked into the back loop only to create a really elegant pattern that is sure to be a beautiful addition to any kitchen.
If you are not familiar with the star stitch, it’s relatively easy to learn. This special stitch forms rows of starburst-like stitches, each worked with multiple loops. This stitch is also sometimes called the "Marguerite stitch" or the "daisy stitch," or even a "spiked cluster."
My favorite feature of these potholders is the double layer of thickness that comes from working them in the round. While they aren’t technically seamless - we join our rounds and chain up - the seam is hidden on the edge of the potholder where it easily blends in.

MATERIALS
Crochet Hook: G/4.00mm - This is my favorite crochet hook and yarn needle set I got from WooCrafts. The set is really affordable and comes with 9 different-sized crochet hooks, 8 yarn needles, stitch markers and a cute carrying case.
Yarn: ~160 yds of medium weight yarn: I used Bernat Softee Baby Cotton
Yarn or tapestry needle
Scissors
ABBREVIATIONS
Ch = chain
Sl st = slip stitch
YO = yarn over
hdc = half double crochet
BLO = back loop only
Star St = Star stitch - there are a few different methods for completing a star stitch. In this pattern, I followed instructions which are outlined in this video tutorial.
Pot Holder INSTRUCTIONS
SIZE
Finished pot holder = ~7.5” x 7.5”
Set Up
To Begin: ch 41
Set up round: hdc in second ch from the hook and in each remaining chain. Then working down the opposite side of the chain, hdc in each ch across. You have now worked both sides of the chain. Join with a Sl st to the top of the first hdc. (80 hdc sts)
Main Pattern
Note: this pattern is worked in the round. The right side of your work will be facing inward as you are working the stitches. After all rounds of crochet are completed we will turn the potholder inside out so that the right side is facing outward before completing the final seam.
Rd 1: ch 3, YO and pull through the 2nd ch from the hook, YO again and pull through the 3rd ch from the hook, YO again and pull through the first hdc st, then YO again and pull through the next hdc st - you should now have 5 loops on your crochet hook as pictured in Figure 1. YO and pull through all 5 loops (Figure 2) then ch 1 to create the ‘eye’ of your first star stitch (Figure 3).
Next, *YO and pull through the eye you just created, YO again and pull through the current hdc that you have already worked, YO again and pull through the next hdc, YO again and pull through the next hdc - you should now have 5 loops on your hook. YO and pull through all 5 loops; then ch 1 to create the “eye” of your next star stitch.* (Figure 4)

Figure 1

Figure 2

Figure 3
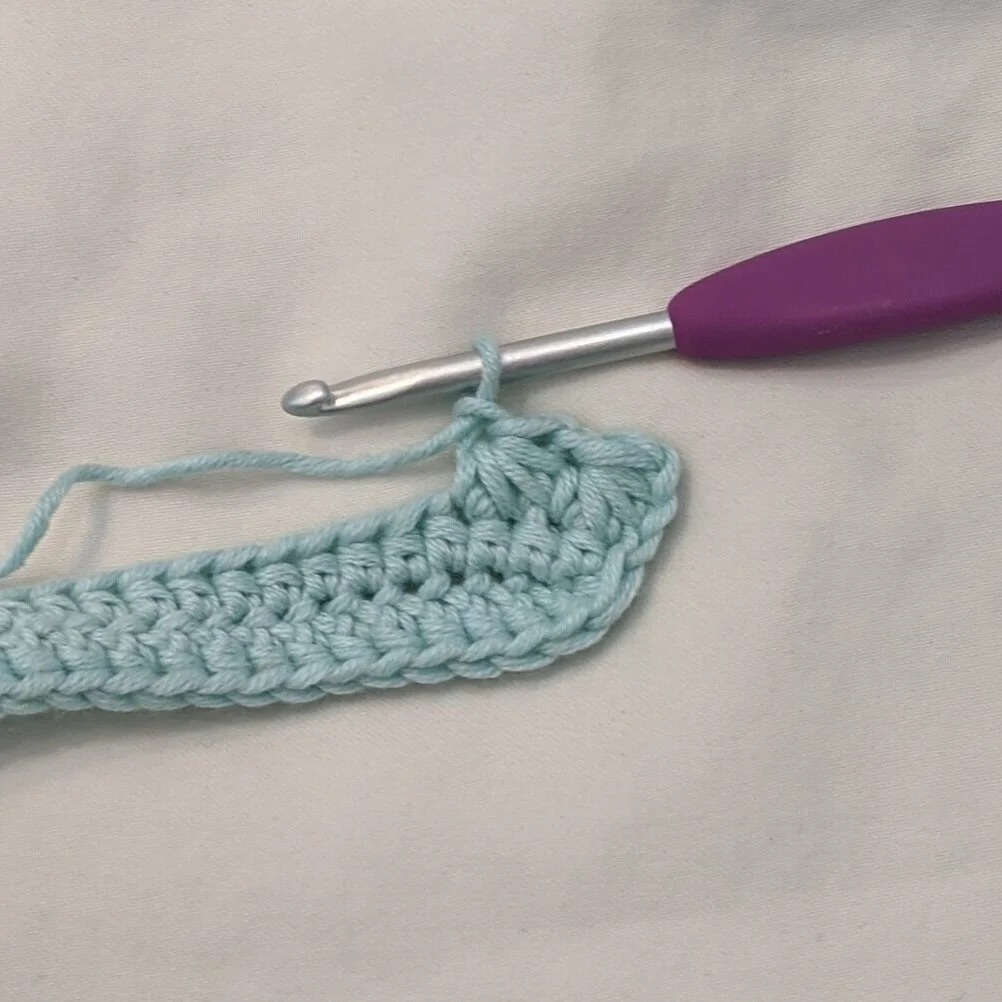
Figure 4
Repeat from * to * until all stitches have been worked. After creating the “eye” of your final star stitch in the round, YO and pull through the eye you just created; YO again and pull through the current hdc you have already worked - you should now have 3 loops on your hook. Finally, join with a sl st to the top of the first star stitch and pull through all 3 loops on your hook to complete the round.
Rd 2: Ch2, work 2 hdc sts into the eye of the first star stitch, work 2 hdc into the eye of the next star stitch - continue to work 2 hdc sts into the eye of every star stitch around, including the last eye. Join with a sl st to the top of the first hdc in the round. (80 hdc sts)
Note: Rd 1 and 2 together will form the star stitch. If you have trouble following the written instructions, check out this video tutorial.
Rd 3: Ch 2, hdc into BLO in each stitch around. Join with a sl st to the top of the first hdc in the round. (80 hdc sts)
Repeat rows 1-3 seven more times, or until potholder reaches desired size ~7 - 7.5”.
For the final round of hdc in BLO, complete as follows: Ch 1, hdc in BLO in each st across the first side of the potholder until you get to the fold. Ch20; sl st back into the base st to form a loop. Hdc in BLO in each of remaining stitches around. Sl st to top of the first stitch to join. (80 + ch20)
Finish
Fasten off, leaving a long tail for seaming. Flip the potholder inside out so that the Right Side of the pattern is facing outward. Use the long tail of yarn and yarn needle to sew the potholder closed. I use a whip stitch to close, but you can use whatever seaming stitch you prefer. Fasten off at the end, then insert the needle into the nearest opening and underneath a few rows (between the two layers of fabric). Pull yarn through tautly, then cut the yarn and pull the fabric so that the tip of the yarn disappears into the potholder.

***You may make and sell products from my patterns but if you do I ask that you link back to my post. Please do not copy and post this pattern and claim it as your own, or attempt to sell this pattern. Please do not re-publish photos as your own.